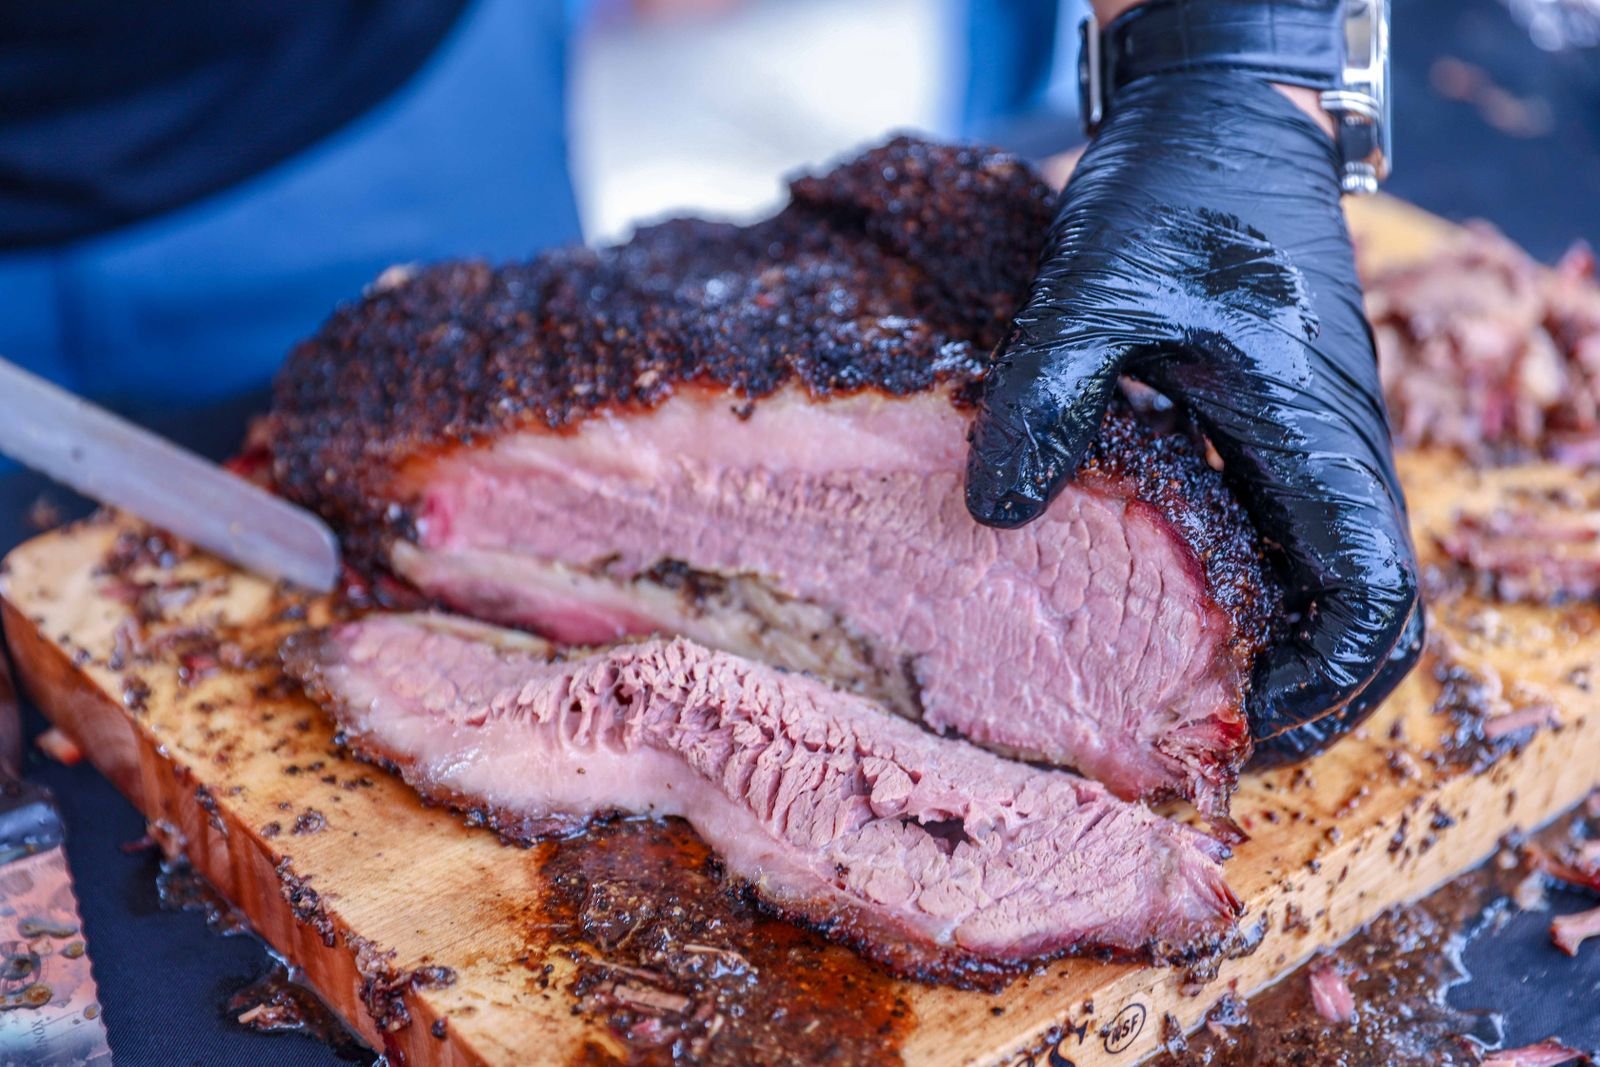
Brisket has a reputation for humbling even experienced pitmasters, and honestly? It’s earned. This is one of the toughest, most stubborn cuts on the steer, and getting it right means hours of steady fire management, patience, and learning to read the meat as it changes. But here’s the thing: when it all comes together — a dark, crackly bark, a juicy flat that slices clean, smoke flavor in every bite — few barbecue experiences reward you like a well-smoked brisket.
An offset smoker is our favorite way to cook brisket. The indirect heat and natural wood smoke flowing through the cook chamber give you that authentic, wood-fired flavor that a pellet grill or oven just can’t match, while the tough connective tissues slowly break down into tenderness over the long cook.
This guide walks through every stage of the process: choosing the brisket, trimming, seasoning, building your fire, managing the stall, wrapping, testing for tenderness, resting, and slicing. If you’re brand new to offsets, our beginner’s guide to offset smokers is a good place to build your foundation first.
Choosing the Right Brisket
Every great brisket starts at the meat counter, not the smoker. A whole packer brisket — flat and point still attached — is the best choice for low and slow cooking, since cooking both muscles together protects the leaner flat during the long smoke.
Know what you’re buying: the flat is the leaner section that produces those classic, uniform slices, while the point is fattier, richer, and more forgiving. Look for good marbling throughout, and give the brisket a gentle bend — one that flexes easily usually has less rigid connective tissue, which is exactly what you want.
USDA Prime briskets generally carry more marbling, and if you can find one at a fair price, it’s worth it. But USDA Choice can still produce outstanding barbecue in the right hands. Fancy beef never replaces good technique — a fresh brisket with even thickness and solid fat distribution will serve you better than a pricey one with a thin, uneven flat.
Trimming the Brisket Properly
Trimming is where many first briskets go sideways. A poorly trimmed brisket cooks unevenly, develops burnt edges, and leaves you with thick slabs of fat that never render. A few careful minutes with a knife at the start pays off for the rest of the cook.
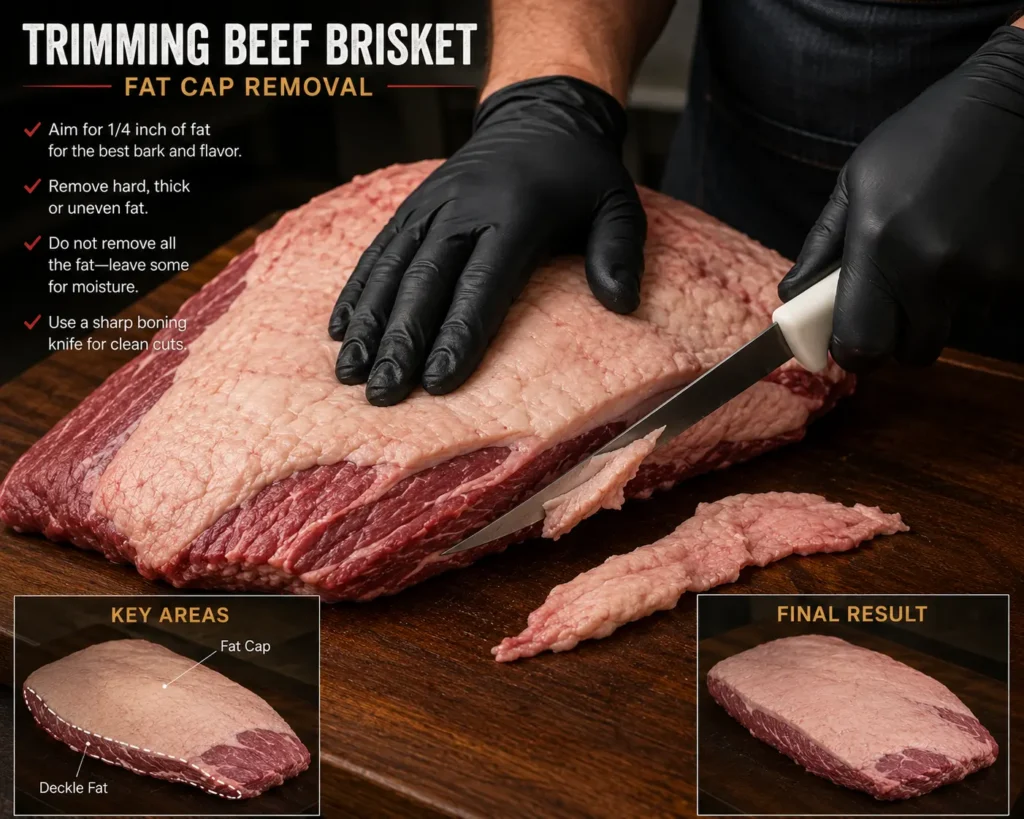
Start with a cold brisket — chilled fat is firmer and much easier to cut cleanly. With a sharp boning knife, remove loose pieces of meat and any thin, ragged edges that would just burn during the long cook.
Trim the fat cap down to about a quarter inch thick. That’s the sweet spot: enough fat to protect the meat and add flavor, but not so much that it blocks seasoning and smoke from reaching the meat. Thick slabs of fat often refuse to render fully and can prevent bark from forming.
Dig out the big chunks of hard fat, especially the dense wedge between the flat and point — it doesn’t render like soft surface fat. Your goal is a smooth, aerodynamic shape that lets heat and smoke flow evenly around the whole brisket.
Seasoning the Brisket
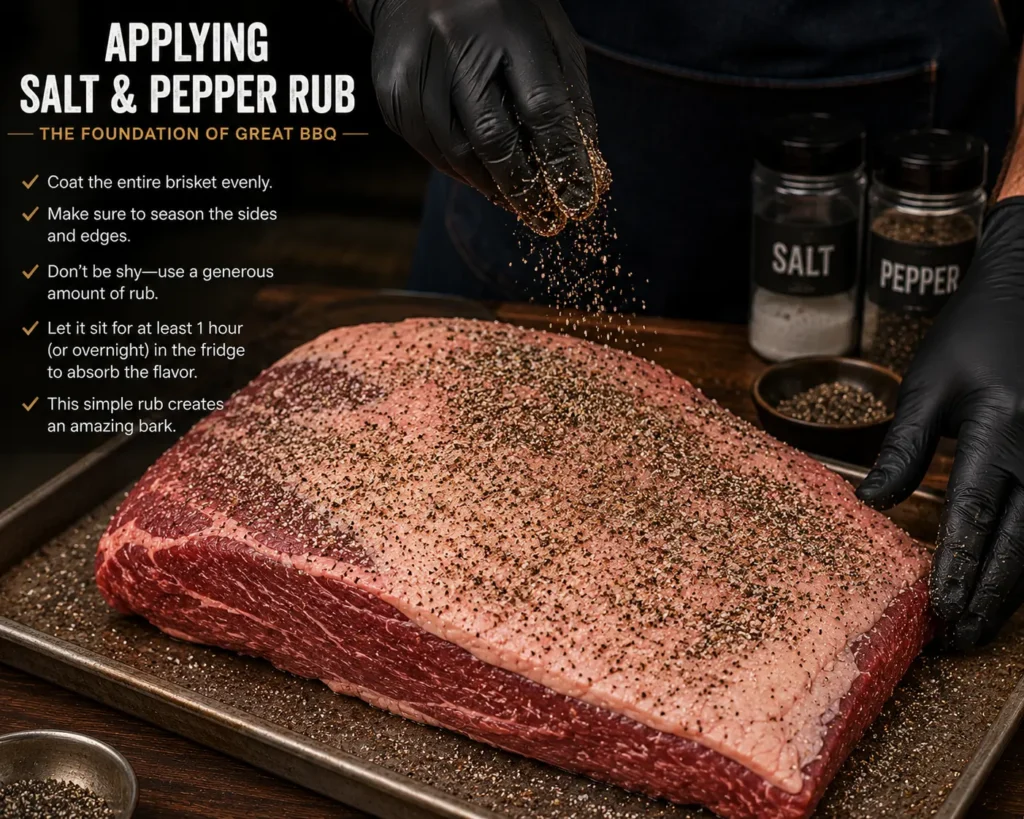
You don’t need a complicated rub to make great brisket — just quality beef, clean smoke, and good technique. In Texas, the classic is dead simple: coarse kosher salt and coarse black pepper, and plenty of both.
Many pitmasters use roughly equal parts salt and pepper by volume, then adjust the ratio to taste. Garlic powder and onion powder add a little savory depth if you like, and paprika can help with color — but neither is essential to building a good bark.
Be generous but not sloppy: coat every surface — sides and edges included — without leaving thick piles of seasoning anywhere. Then let the seasoned brisket sit while the smoker preheats, so the rub can adhere to the moist surface of the meat.
You’ll hear both approaches — seasoning hours ahead versus right before the cook — and honestly, both work fine as long as the coating is even. Pick whichever fits your schedule.
Preparing the Offset Smoker
Brisket is a marathon cook, so getting your fire right at the start matters more here than with almost any other cut. A stable, clean-burning fire at the beginning makes the next twelve-plus hours dramatically easier. And if your smoker is brand new, make sure you’ve already taken the time to season an offset smoker before committing to a brisket.
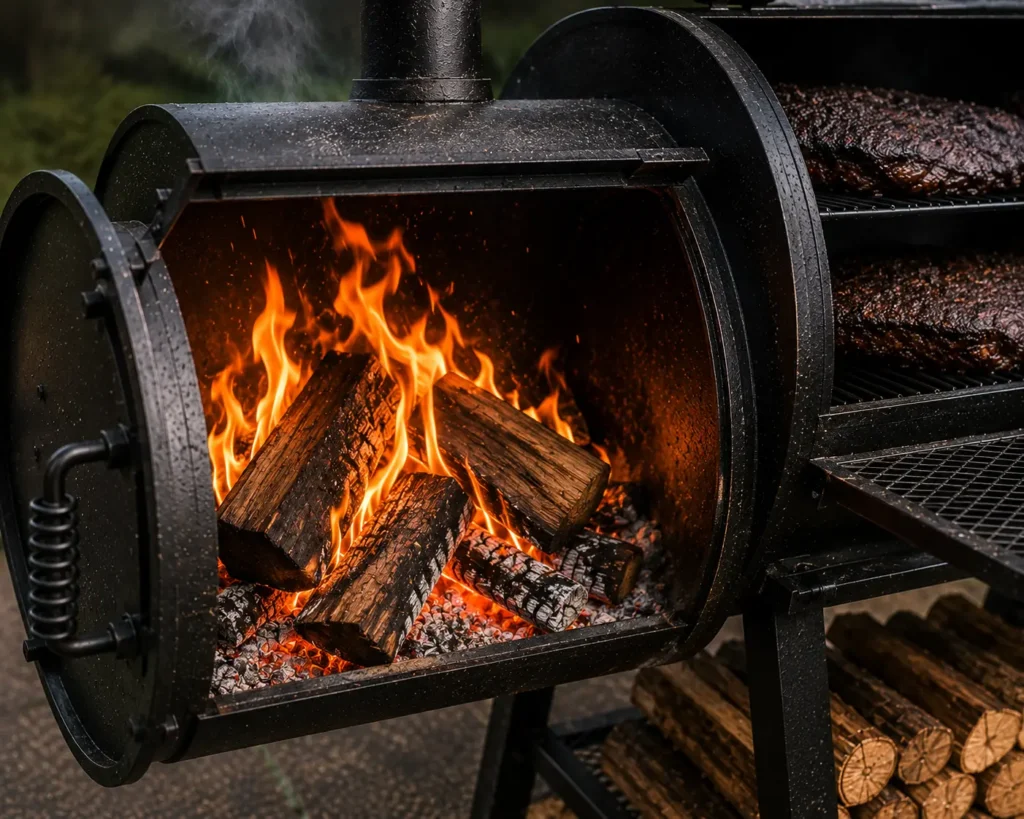
Start by clearing old ash out of the firebox — ash buildup chokes airflow and kills fire stability. Light a chimney of charcoal and let the coals get fully established before moving them into the firebox.
Once you have a strong coal bed, add a small split of seasoned hardwood. Oak is one of our favorite choices for brisket: it burns steadily and gives a balanced, beef-friendly smoke. Hickory brings a stronger, more traditional barbecue profile, while mesquite is much more intense and should be used with a light hand. For a deeper look at fire building, our offset smoker fire management guide walks through it in detail.
Let the smoker preheat until the cook chamber settles between 225°F and 250°F. Keep airflow healthy and wait for clean, thin blue (or nearly invisible) smoke before the brisket goes on.
Pro tip: don’t rush this step. A stable smoker at the start creates a far better foundation than meat going into a chamber that’s still swinging up and down.
Placing the Brisket in the Smoker
Once the cook chamber has settled, it’s time to load the brisket. Placement matters on a traditional offset because the area near the firebox runs hotter — a little strategy here protects your lean flat from overcooking.
Aim the thicker point toward the hotter side of the smoker. The point’s extra fat can handle stronger heat, while the lean flat does better in the cooler zone.
Fat side up or fat side down? It depends on where the heat hits hardest in your smoker. On most traditional offsets, heat comes from the firebox side and moves across the chamber, so many pitmasters position the fat cap toward that stronger heat source for extra protection.
The honest answer: there’s no universal rule. Learning how your specific smoker moves heat matters far more than following a one-size-fits-all answer from the internet.
Slide a reliable temperature probe into the thickest part of the flat, avoiding big pockets of fat. Close the lid and let the long smoke begin.
Smoking the Brisket Low and Slow
Now the real work starts: holding the cook chamber between 225°F and 250°F for traditional low and slow barbecue. Our offset smoker cooking temperature guide covers ideal ranges for other cuts too, if you want to compare.
The early hours do the heavy lifting — the brisket picks up most of its smoke flavor and the bark starts forming. Fight the urge to keep peeking: every lid opening dumps heat and disrupts the stable environment you just worked to build.
Feed the fire with small, seasoned wood splits as needed — little and often beats loading up the firebox with several big logs at once. Smaller, frequent additions hold steadier temperatures and burn cleaner. These are the same principles behind how to control heat in an offset smoker, and they matter most on a long brisket cook.
Watch the color: the brisket should gradually darken as rub, smoke, rendered fat, and surface moisture do their work. A developing bark turns deep brown or nearly black — that’s not burnt, that’s exactly what you want.
Spritzing the Brisket
Spritzing is optional, but it can keep dry spots on the surface from getting leathery. Water, diluted apple cider vinegar, or beef broth all work — pitmasters have their favorites, and none of them is magic.
The key is timing: don’t spritz early. The seasoning needs time to adhere and the bark needs time to set. Spraying too soon or too often washes away your rub and stalls bark development.
Once the bark has started setting, lightly mist only the areas that look genuinely dry. The goal is a touch of moisture, not a soaking — too much cools the surface and drags out the cook.
Pro tip: a light spritz every hour or so is plenty. If the surface already looks moist and healthy, skip it — don’t spray just because the clock says so.
Understanding the Brisket Stall
At some point during the cook, you’ll glance at the thermometer and think something’s broken: the internal temperature just stops climbing, commonly somewhere around 150°F to 170°F. Welcome to the stall — every brisket cook meets it.
What’s happening is evaporative cooling: moisture evaporating off the surface cools the meat as fast as the heat warms it, so the temperature can sit nearly flat for hours. It’s physics, not a malfunction.
Don’t panic. You can simply ride it out and let the brisket push through naturally, or wrap it once the bark looks the way you want — wrapping helps the cook power through the stall faster.
Pro tip: pitmasters generally agree the bark is the better wrapping signal than any exact temperature. Read the meat, not just the numbers.
Wrapping the Brisket
Wrapping is the lever that gets you through the stall faster while holding onto moisture. It’s optional, but most brisket cooks wrap at some point — and the bark is your signal for when.
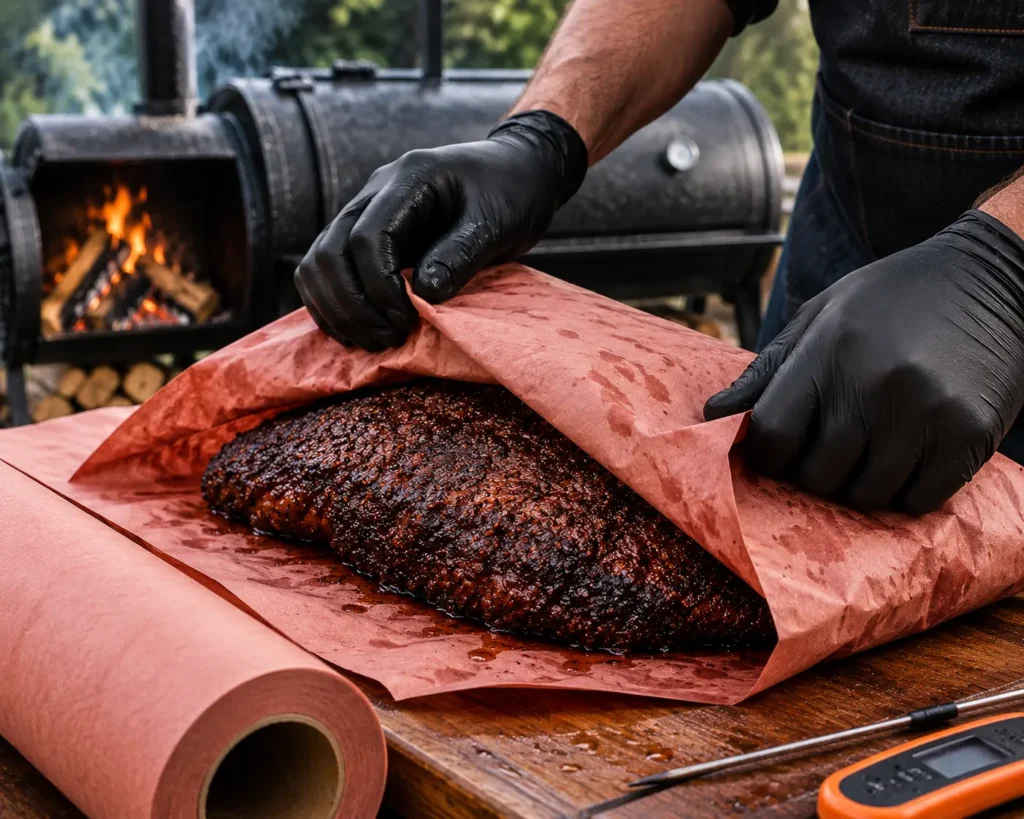
Pink butcher paper is the most popular choice: it protects the meat while still letting it breathe, so the bark stays intact better than it does under foil. Aluminum foil traps more moisture and generally speeds things up even more, but it tends to soften the bark. Neither is wrong — pick based on the texture you prefer.
Wait until the bark has developed a deep color and no longer rubs off easily when touched, then wrap tightly and return the brisket to the smoker at a steady temperature.
From here, the cook enters its final phase: connective tissue keeps breaking down and the meat gradually turns tender. Your job is mostly to keep the fire steady and stay patient.
Cooking Until the Brisket Is Probe Tender
This is where most beginners stumble: they pull the brisket the moment it hits a target temperature. Temperature tells you where to start checking — tenderness tells you when it’s done.
Most briskets finish somewhere between 195°F and 205°F, but treat that as a zone, not a rule. Every brisket carries different amounts of connective tissue and marbling, so one might be ready at 198°F while another needs 203°F or a touch higher.
Probe several areas of both the flat and the point with a thin thermometer probe or skewer. When it’s ready, the probe should slide in with very little resistance — like pushing into softened butter. Give the flat the most attention: it’s leaner and goes dry faster if it overcooks.
Once the whole brisket feels consistently tender, it’s time to rest — not slice.
Why Internal Temperature Is Only a Guide
This is one of the most important lessons in barbecue: internal temperature is where you begin checking for doneness, not what decides it. Hitting one magic number can leave you with brisket that’s either tough or overdone.
A brisket can read 200°F and still feel tight on the probe — the connective tissue just needs more time. Another might turn tender a little earlier thanks to better marbling or a different muscle structure. The thermometer points you in the right direction; your probe confirms the finish.
Start checking around 195°F and keep cooking until the probe glides through the flat with minimal resistance. That combination — temperature plus feel — produces far more consistent results than temperature alone.
Pro tip: learning to recognize probe tenderness is genuinely one of the skills that separates average brisket from exceptional barbecue. It’s worth practicing on every cook.
Resting the Brisket Properly
After all those hours, the brisket needs time to relax — and this step gets skipped more often than any other. Resting lets the internal temperature ease down gradually and the juices redistribute through the meat.
Slice too soon and you’ll watch a river of moisture escape onto the cutting board. Resting lets the muscle fibers relax, which improves both texture and juiciness.
Keep the brisket wrapped and rest it for at least one hour. Even better: many pitmasters hold brisket for two to four hours in an insulated cooler or warm environment, and the results show it.
If you’re using a cooler, wrap the brisket in a clean towel and place it inside without ice. The insulation keeps it at a safe serving temperature while the meat continues to relax.
Pro tip: a long, controlled rest often improves the finished brisket more than an extra hour on the smoker ever could.
Slicing the Brisket Correctly
You’ve done everything right for twelve-plus hours — don’t undo it in the final five minutes. A perfectly cooked brisket can still eat tough if it’s sliced with the grain, because those long muscle fibers need to be cut short to feel tender.
The tricky part: the grain runs in different directions in the flat and the point. Check the grain direction before cooking, or make a small reference cut on one corner during trimming so you’re not guessing later.
Start with the flat and slice across the grain to about a quarter inch thick. The slices should hold together when you lift them but pull apart with a gentle tug.
When you reach the point, rotate the brisket — the fibers run a different way there. You can slice the point a touch thicker, or separate it from the flat if you’re making burnt ends.
And use a long, sharp slicing knife. A short or dull knife tears the meat and crushes that bark you spent all day building.
Making Burnt Ends From the Point
Burnt ends are the payoff for the fattier point section — rich, smoky, caramelized bites that many barbecue lovers consider the best part of the brisket. The point’s marbling and connective tissue make it ideal for this second round of cooking.
Separate the point from the flat and cut it into roughly one-inch cubes. Arrange them in a pan and hit them with a little more rub.
Add a small amount of barbecue sauce if you like, then return the pan to the smoker for another thirty to sixty minutes. That extra time lets the edges caramelize while the internal fat keeps rendering.
Good burnt ends should be rich, tender, smoky, and slightly sticky on the outside — never dry.
Best Wood for Smoking Brisket
Brisket sits in the smoke for a long time, so your wood choice matters more here than with quick cooks. You want smoke strong enough to stand up to beef without bullying it.
Oak is one of the best all-around choices — it burns steadily with balanced smoke that’s noticeable without being overpowering, which makes it especially beginner-friendly.
Hickory brings a deeper, more traditional barbecue flavor and pairs beautifully with beef. Use it alone or blend it with oak for a more complex smoke profile.
Mesquite delivers very strong smoke and burns hot, so use it sparingly — small amounts add bold Texas-style character, but too much will overpower the brisket.
Pecan offers a slightly sweeter smoke that blends well with oak or hickory.
Pro tip: whichever wood you choose, make sure it’s properly seasoned hardwood. Clean combustion and thin blue smoke start with dry wood — there’s no working around it.
Maintaining a Strong Bark
A great bark is one of the signatures of a successful brisket. It’s built from a combination of seasoning, smoke, heat, rendered fat, and surface moisture working together over hours.
It starts with an even layer of coarse seasoning — salt and black pepper give the smoke something to cling to and create that textured, dark surface.
Don’t wrap too early. The bark needs time to set before it’s covered — if the seasoning still wipes away easily, keep cooking unwrapped until the surface is firm and dark.
Spritz only when the surface actually needs it, and remember that foil gives you softer bark than butcher paper. Every moisture choice you make shows up in the bark.
When the cook is done, the bark should feel firm — not hard, not burnt, just set.
Common Brisket Mistakes to Avoid
Most brisket problems come from rushing or overreacting to small changes. Here are the big ones to watch for.
Dirty smoke is the most damaging mistake. Thick white smoke lays down bitter flavors that soak into the entire brisket and don’t come out. Keep the fire small and clean, burn only properly seasoned wood, and revisit our fire management guide if dirty smoke keeps showing up.
Lid-peeking is another cook-killer. Every time you open the cooking chamber, you dump heat and reset the stable environment the brisket depends on. Trust your thermometers — open up only to spritz, wrap, or check tenderness.
Pulling by temperature alone leads to tough meat, as we covered above. Always confirm doneness with the probe.
Skipping the rest is the most common mistake of all. Even a beautifully cooked brisket loses moisture if it’s sliced the moment it comes off the smoker.
And finally: cutting with the grain makes the meat eat tougher than it is. Always slice across the grain.
Expert Tips for Better Brisket
Pitmasters who turn out great brisket consistently aren’t using secret tricks — they’re just consistent. A few habits make the biggest difference.
Keep the fire small and clean rather than building an oversized one. Stable heat always beats constant temperature corrections.
Use a digital thermometer at grate level. The built-in lid thermometer often reads hotter than the air actually surrounding your brisket.
Warm your wood splits near the firebox before adding them. Preheated wood ignites faster and produces far less dirty smoke when you refuel.
Take notes on every cook: brisket weight, trimming approach, seasoning, wood type, cooking temperature, when you wrapped, total cook time, and how it turned out. Those notes turn luck into repeatability.
And most importantly: don’t rush brisket. Every one cooks at its own pace, and patience is usually the difference between average barbecue and outstanding barbecue.
Frequently Asked Questions
A whole packer brisket often requires approximately one to one and a half hours per pound when cooked between 225°F and 250°F. However, total cooking time varies depending on brisket size, smoker temperature, weather conditions, and the length of the stall.
Most briskets become tender between 195°F and 205°F. Begin checking for tenderness around 195°F and remove the brisket when a probe slides easily through the flat with very little resistance.
Wrapping is optional. Butcher paper helps preserve bark while reducing moisture loss, while aluminum foil speeds up cooking and traps more moisture. The best method depends on your preferred bark and cooking style.
Position the fat cap toward the strongest heat source. In many offset smokers, this may mean fat side down or angled toward the firebox. The correct position depends on your smoker’s heat pattern.
Rest the brisket for at least one hour. A two-to-four-hour rest often produces even better texture and moisture retention.
Final Verdict
Great brisket comes down to patience, clean fire management, and paying attention at every stage — choosing a well-marbled packer, trimming it properly, building a steady fire, holding temperatures through the stall, and giving the finished meat a real rest. Each step feeds the next.
The best brisket isn’t the one that chased one exact time or temperature. It’s the one where the cook watched the bark, wrapped when it was ready, and probed for tenderness instead of the clock. Those are skills, and they get better with every cook.
Whether you’re cooking for the family, a backyard gathering, or a serious barbecue event, this recipe gives you the foundation for tender, juicy, deeply flavorful smoked beef. With good meat, seasoned hardwood, stable heat, and a proper rest, your offset smoker can turn out barbecue that holds its own against professional smokehouses.
If you enjoyed this recipe, try our guide on how to smoke ribs in an offset smoker next — another classic low and slow project worth your time.