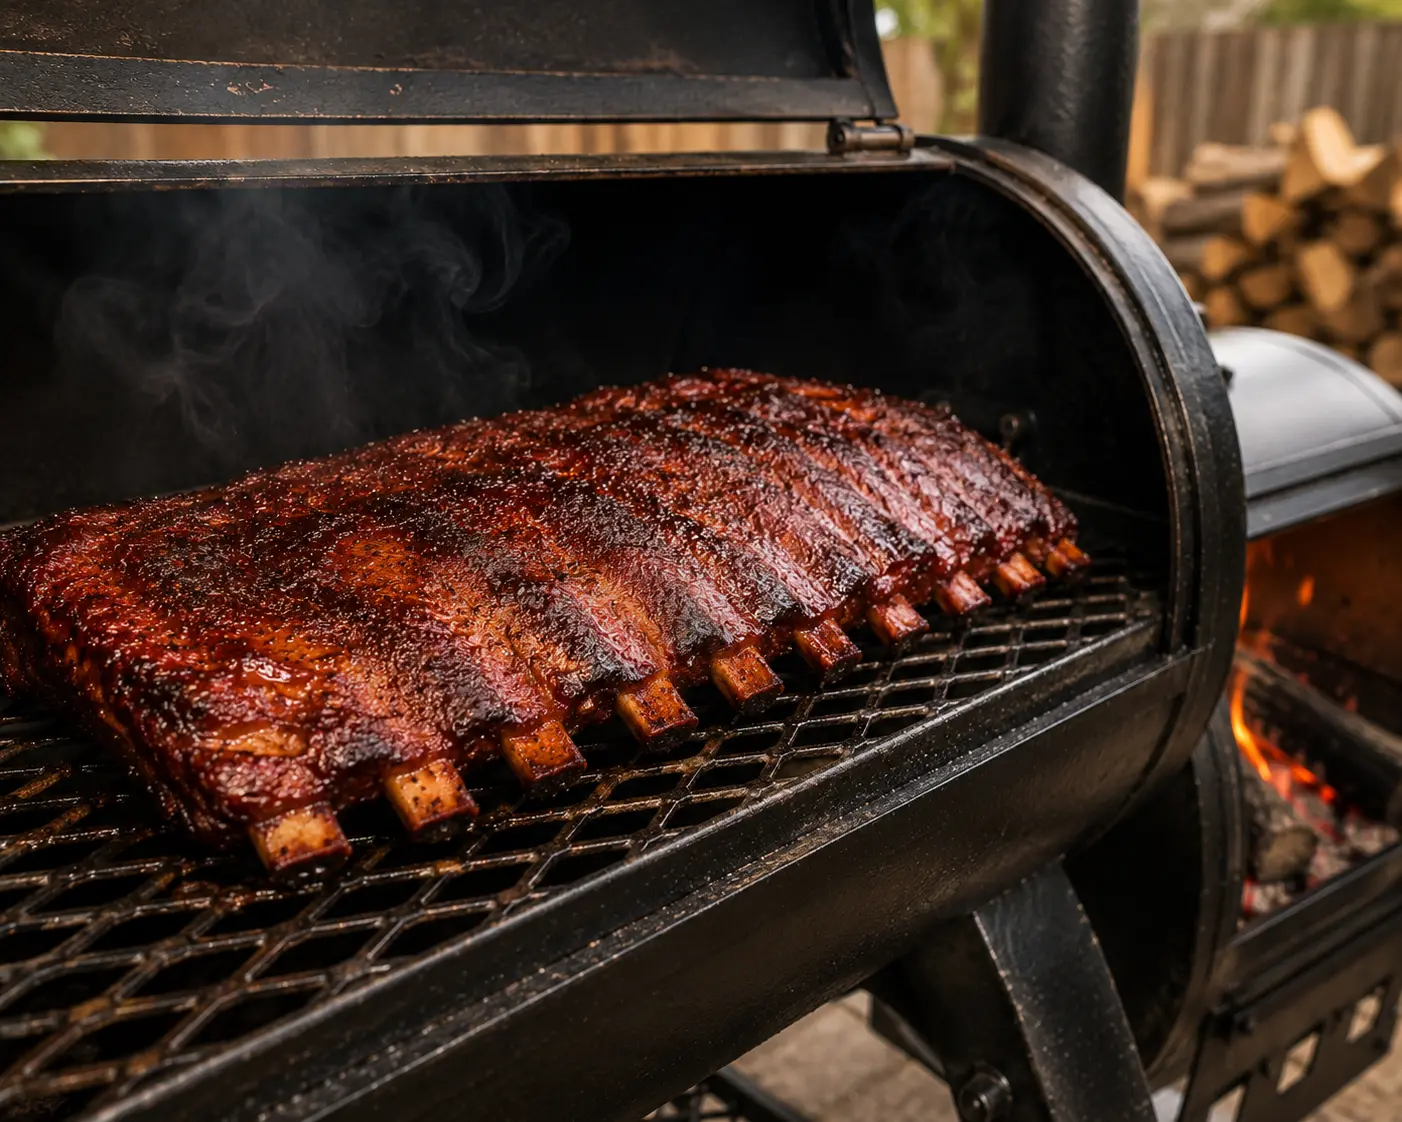
Learning how to smoke ribs in an offset smoker is one of the most rewarding skills any barbecue enthusiast can master. Few foods represent authentic barbecue better than perfectly smoked ribs with a rich smoke ring, flavorful bark, and tender meat that pulls cleanly from the bone. While smoking ribs requires patience and attention to detail, the results are worth every minute spent managing the fire and maintaining steady temperatures.
An offset smoker creates the ideal environment for cooking ribs because it uses indirect heat and natural wood smoke instead of direct flames. Heat travels from the firebox into the cooking chamber, allowing the ribs to cook slowly while absorbing deep smoky flavor throughout the entire cooking process. Unlike grilling, which cooks food quickly over high heat, smoking transforms tougher cuts into tender, juicy barbecue by breaking down connective tissues over several hours.
Whether you are preparing baby back ribs, spare ribs, or St. Louis-style ribs, understanding how to smoke ribs in an offset smoker will help you achieve consistent results every time. This complete guide explains everything from choosing the right ribs and preparing the smoker to managing temperature, selecting hardwood, and knowing exactly when your ribs are ready to serve.
Why an Offset Smoker Is Perfect for Smoking Ribs
One of the biggest advantages of learning how to smoke ribs in an offset smoker is the ability to cook using indirect heat. Because the fire is located inside a separate firebox, the ribs are never exposed directly to flames. Instead, clean heat and smoke circulate naturally through the cooking chamber before exiting through the chimney. This slow cooking process produces tender meat while preserving moisture and developing authentic wood-fired barbecue flavor.
Offset smokers also give pitmasters complete control over airflow, smoke production, and cooking temperature. Small adjustments to the intake damper allow you to regulate oxygen entering the firebox, while the chimney controls smoke circulation throughout the smoker. Once you understand these controls, maintaining steady cooking temperatures becomes much easier, resulting in more consistent barbecue.
Another benefit is the flexibility to experiment with different hardwoods. Oak delivers balanced smoke suitable for almost every type of meat, hickory creates bold traditional barbecue flavor, and fruit woods such as apple and cherry provide a sweeter, milder smoke that complements pork exceptionally well. This ability to customize flavor is one of the main reasons experienced pitmasters prefer offset smokers over many other cooking methods.
Choosing the Best Ribs for Smoking
Before learning how to smoke ribs in an offset smoker, it is important to choose the right type of ribs. Different cuts offer unique textures, cooking times, and flavor profiles, allowing you to select the option that best suits your barbecue preferences.
Baby back ribs are among the most popular choices because they are lean, tender, and cook faster than larger cuts. These ribs come from the upper portion of the rib cage near the loin and contain less fat, making them ideal for beginners who want excellent results in a shorter amount of time.
Spare ribs contain more meat, additional fat, and more connective tissue than baby back ribs. Although they require a longer cooking time, the extra fat creates richer flavor and outstanding tenderness when smoked properly. Many experienced pitmasters prefer spare ribs because they remain juicy throughout long smoking sessions.
St. Louis-style ribs are trimmed spare ribs with a more uniform rectangular shape. This trimming improves presentation while allowing the ribs to cook more evenly across the entire rack. Because of their consistent thickness and rich flavor, St. Louis ribs are commonly used in barbecue competitions and professional restaurants.
No matter which cut you choose, purchasing high-quality fresh ribs from a trusted butcher or meat supplier significantly improves the final result.
Preparing the Ribs Before Smoking
Proper preparation plays an important role in mastering how to smoke ribs in an offset smoker. Taking time to trim and season the ribs correctly ensures they cook evenly while developing excellent bark and deep smoky flavor.
Begin by inspecting the ribs for excess fat. Trim away thick deposits that will not fully render during the smoking process while leaving enough fat to help keep the meat moist. Over-trimming can reduce flavor, so only remove unnecessary portions.
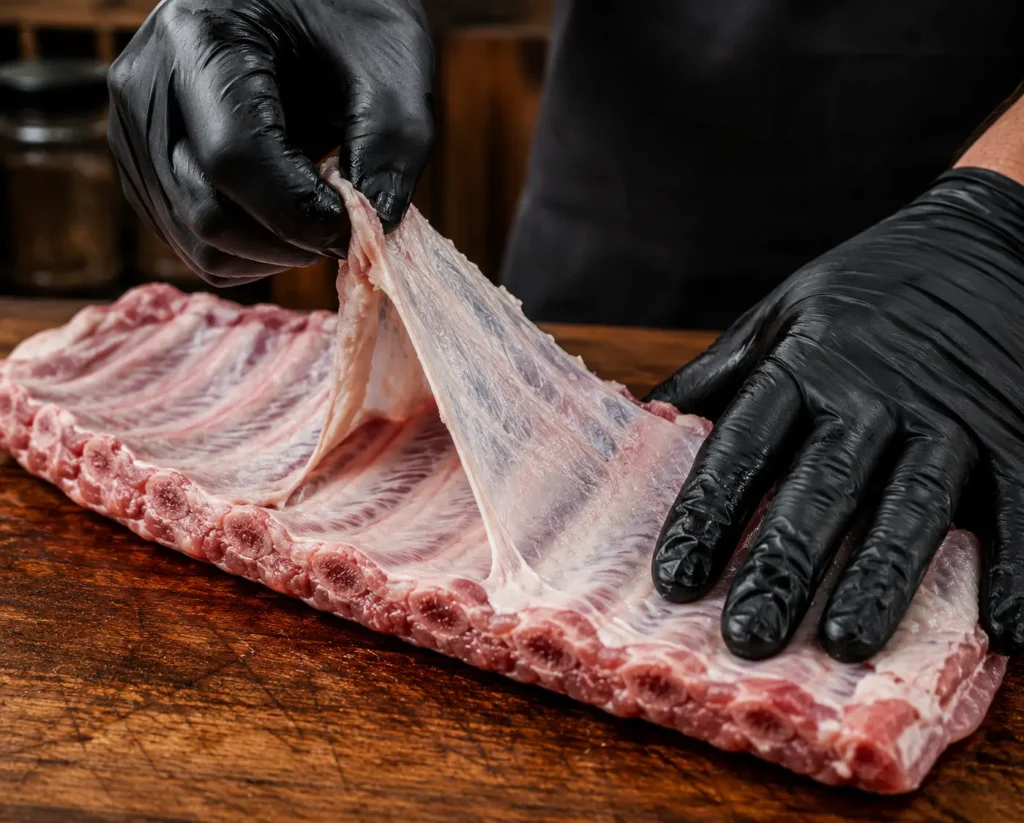
The membrane on the back of the ribs should also be removed. This thin layer becomes tough during cooking and prevents seasoning and smoke from penetrating the meat properly. Using a butter knife and a paper towel makes removing the membrane much easier and helps improve tenderness.
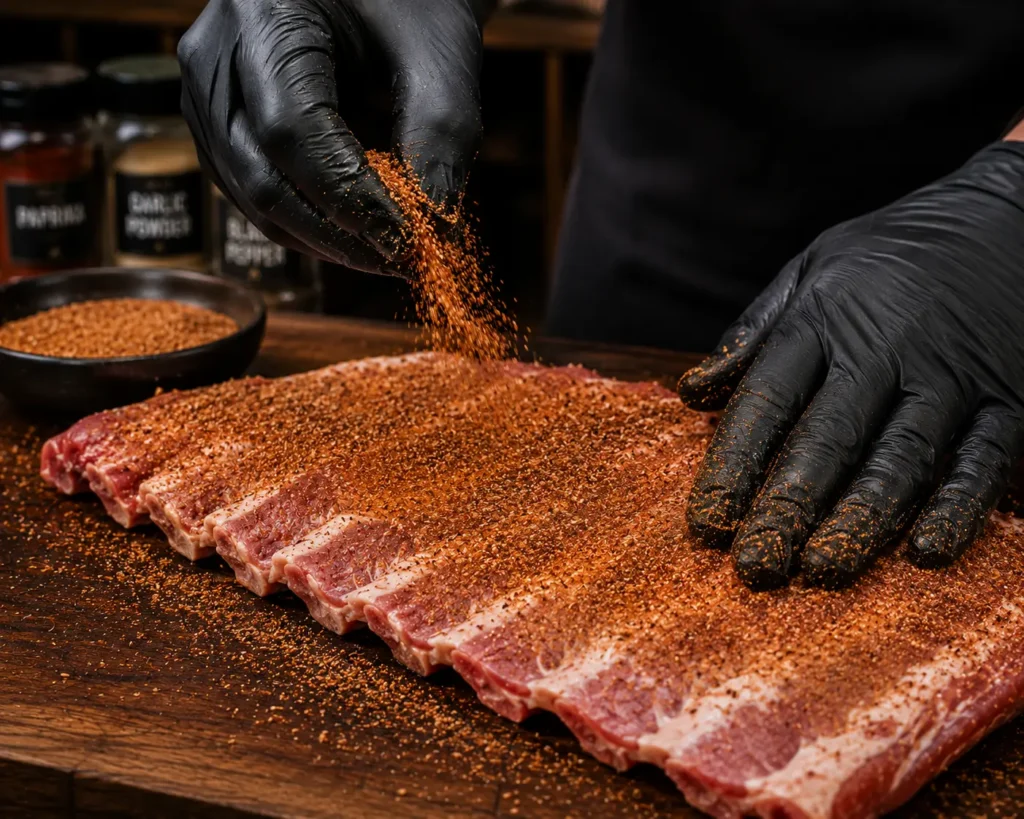
Once trimmed, lightly coat both sides of the ribs with yellow mustard or a neutral cooking oil. This acts as a binder that helps the seasoning adhere to the meat without affecting the final flavor. Apply your dry rub generously across every surface, pressing it gently into the meat rather than rubbing aggressively.
Allow the seasoned ribs to rest for at least thirty minutes before placing them in the smoker. Many pitmasters prefer seasoning the ribs several hours in advance or refrigerating them overnight, giving the spices more time to penetrate the meat and develop deeper flavor.
The Best Dry Rub for Smoked Ribs
A quality dry rub is one of the most important components when learning how to smoke ribs in an offset smoker. The right combination of spices creates a flavorful bark while complementing the natural taste of the pork instead of overpowering it.
Most traditional barbecue rubs combine salt, black pepper, paprika, garlic powder, onion powder, brown sugar, and a small amount of chili powder or cayenne pepper. Salt enhances the natural flavor of the meat, while paprika contributes color and mild sweetness. Brown sugar caramelizes during cooking, helping create the dark bark that many barbecue enthusiasts love.
Some pitmasters customize their rubs by adding cumin, mustard powder, celery salt, or smoked paprika to create unique regional flavor profiles. The exact seasoning blend depends on personal preference, but balancing sweetness, saltiness, and mild heat generally produces excellent results.
Regardless of the ingredients used, applying the rub evenly across the entire rack helps ensure every bite develops consistent flavor throughout the smoking process.
Setting Up Your Offset Smoker
Proper smoker preparation is essential when learning how to smoke ribs in an offset smoker. Even the highest-quality ribs will not produce outstanding barbecue if the smoker is not operating correctly.
Start by cleaning any leftover ash from previous cooks because excessive ash restricts airflow and reduces combustion efficiency. Good airflow is essential for maintaining stable temperatures throughout the cooking process.
Fill the firebox with quality lump charcoal and light it using a charcoal chimney starter. Once the charcoal has developed a layer of gray ash, begin adding seasoned hardwood splits. Oak remains one of the most reliable options because it burns evenly while producing balanced smoke, although hickory, pecan, cherry, and apple are also excellent choices depending on the flavor profile you prefer.
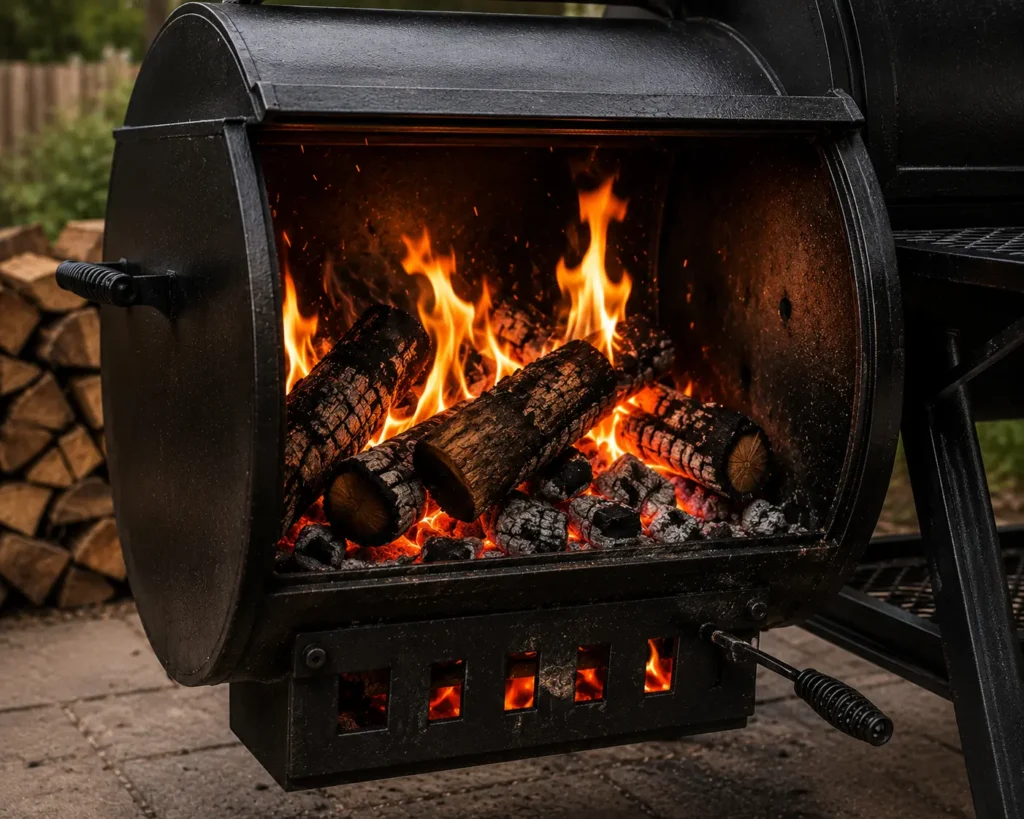
Allow the smoker to preheat until the cooking chamber stabilizes between 225°F and 250°F. This temperature range is considered ideal for smoking pork ribs because it allows connective tissue to gradually break down without drying the meat. Thin blue smoke coming from the chimney indicates clean combustion and is generally considered the perfect smoke for producing high-quality barbecue.
Maintaining the Perfect Smoking Temperature
One of the most important parts of understanding how to smoke ribs in an offset smoker is learning to maintain stable temperatures throughout the cook. Temperature fluctuations can affect tenderness, bark development, and overall cooking time.
Instead of making large adjustments to the dampers, experienced pitmasters recommend making small changes and waiting several minutes for the smoker to respond. Opening the intake damper increases oxygen flow and raises cooking temperatures, while slightly closing it reduces the fire’s intensity.
Adding small wood splits at regular intervals also helps maintain stable heat. Avoid adding large amounts of wood all at once because sudden increases in fuel can produce excessive smoke and cause unwanted temperature spikes.
Keeping the cooking chamber closed as much as possible is equally important. Every time the lid is opened, valuable heat and smoke escape, extending cooking time and reducing efficiency. Trust your thermometers and resist the temptation to check the ribs too frequently.
Smoking the Ribs Step by Step
Once your smoker has stabilized between 225°F and 250°F, it is time to begin the actual smoking process. Place the ribs on the cooking grate with the bone side facing down and position them away from the firebox. This placement protects the meat from excessive radiant heat while allowing smoke to circulate evenly around the entire rack. Proper placement is one of the most important steps when learning how to smoke ribs in an offset smoker because it encourages slow, even cooking from beginning to end.
During the first few hours, resist the urge to constantly open the cooking chamber. Every time the lid is lifted, heat and smoke escape, increasing the overall cooking time and reducing temperature stability. Instead, monitor the smoker using a reliable digital thermometer and make small airflow adjustments whenever necessary. Clean, thin blue smoke should continue flowing from the chimney throughout the cook, as this produces the balanced wood-fired flavor that defines authentic barbecue.
The first stage of smoking is where the ribs develop their bark and absorb the majority of their smoke flavor. Maintaining a clean-burning fire with properly seasoned hardwood during this period creates the rich color, smoky aroma, and flavorful exterior that make offset-smoked ribs so popular.
Understanding the 3-2-1 Method
Many beginners searching for how to smoke ribs in an offset smoker quickly discover the popular 3-2-1 method. This technique is one of the easiest ways to produce tender, juicy ribs while learning proper temperature management.
The process begins by smoking the ribs uncovered for three hours. During this stage, the meat absorbs smoke while developing bark and rich barbecue color. Keep the smoker between 225°F and 250°F and avoid excessive lid openings that can disrupt the cooking environment.
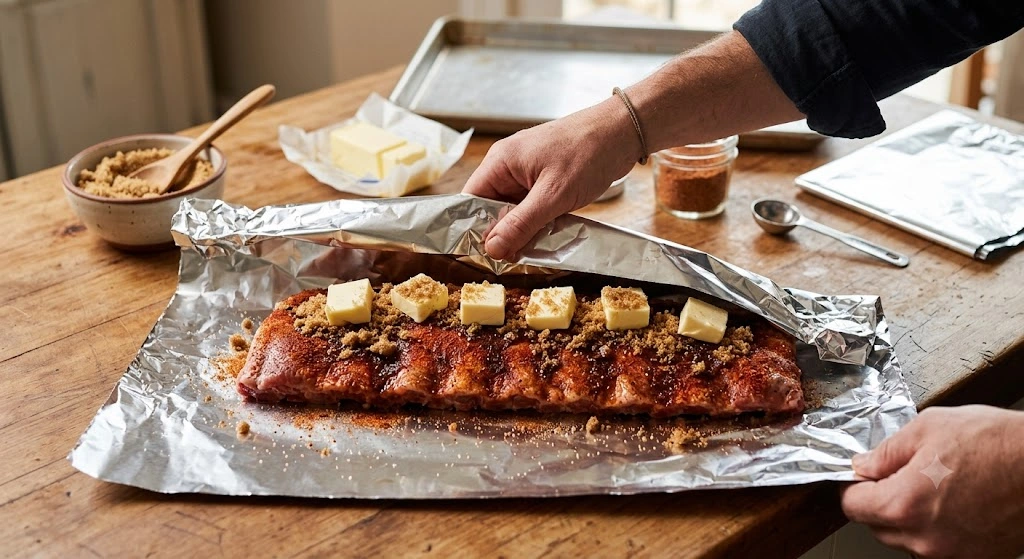
After three hours, remove the ribs and wrap them tightly in heavy-duty aluminum foil. Before sealing the foil, many pitmasters add apple juice, apple cider vinegar, melted butter, honey, or brown sugar to create additional moisture and flavor. Return the wrapped ribs to the smoker for approximately two more hours. The enclosed environment softens connective tissue, making the ribs noticeably more tender.
The final stage involves removing the ribs from the foil and placing them back onto the cooking grate for approximately one additional hour. This allows the bark to firm up while the surface develops a beautiful finish. If barbecue sauce is being used, this is the ideal time to apply it because the heat caramelizes the sauce without burning the sugars.
Although the 3-2-1 method works exceptionally well for spare ribs and St. Louis-style ribs, baby back ribs often require less time because they are leaner and smaller. Many pitmasters adjust the method slightly depending on the thickness of the meat.
Should You Wrap the Ribs?
Wrapping remains one of the most debated topics among barbecue enthusiasts learning how to smoke ribs in an offset smoker. Both methods produce excellent barbecue, but each creates a slightly different texture.
Wrapping helps trap moisture around the meat, accelerating the breakdown of connective tissue and producing exceptionally tender ribs. This technique also shortens the overall cooking time while reducing moisture loss during long smoking sessions. For beginners, wrapping often produces more consistent results because it reduces the chance of drying out the ribs.
Cooking without wrapping requires more patience but produces firmer bark and a slightly stronger smoke flavor. Many experienced competition pitmasters prefer this approach when they want maximum bark development and a traditional bite-through texture rather than meat that completely falls off the bone.
Neither method is universally better. The choice depends on your personal preference and the style of barbecue you want to create.
Spritzing for Better Moisture
Spritzing is another useful technique that can improve results when mastering how to smoke ribs in an offset smoker. Lightly spraying the ribs during cooking helps maintain surface moisture while encouraging smoke to adhere to the meat.
Many pitmasters begin spritzing after the first ninety minutes of cooking. Apple juice remains one of the most popular choices because it adds subtle sweetness without overpowering the natural pork flavor. Others prefer apple cider vinegar diluted with water, while some use a simple mixture of water and Worcestershire sauce for additional depth.
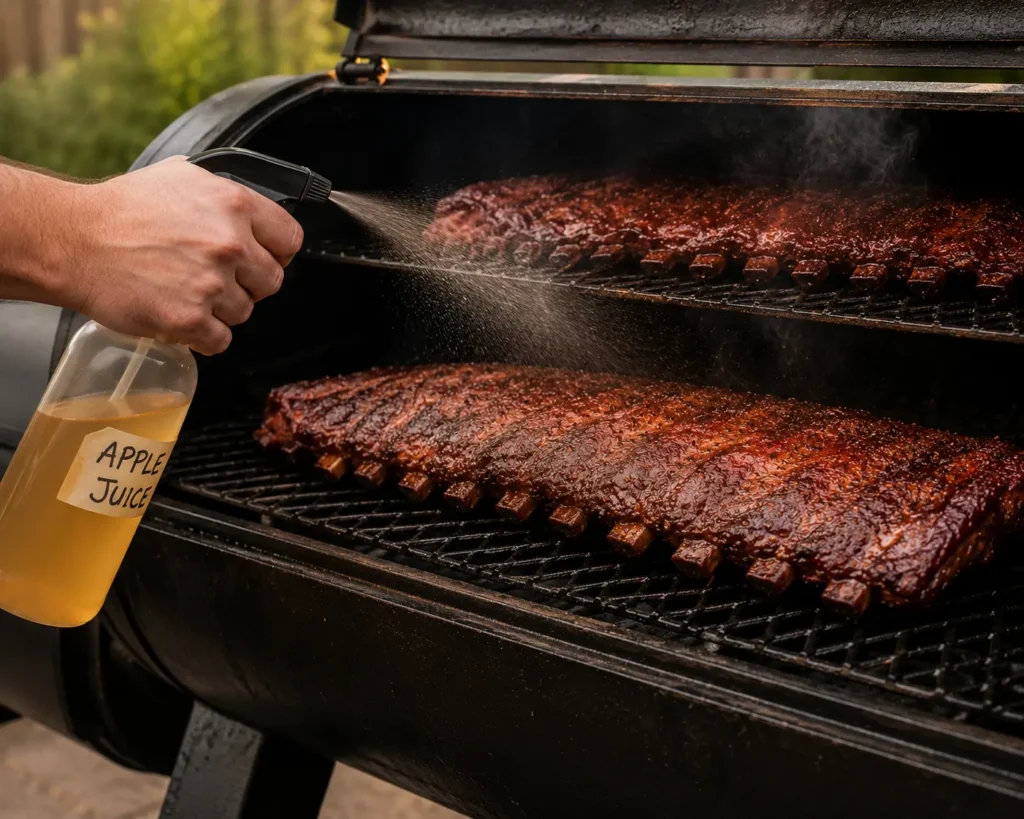
Spritzing should be done lightly and quickly. Excessive spraying cools the meat and extends cooking time unnecessarily. A light mist every forty-five to sixty minutes is usually sufficient to maintain moisture without disrupting the cooking process.
Applying Barbecue Sauce and Glaze
Not every barbecue enthusiast uses sauce, but for those who enjoy sticky, caramelized ribs, the final stage of cooking is the perfect opportunity to apply it. Understanding when to glaze the ribs is an important part of learning how to smoke ribs in an offset smoker because applying sauce too early can cause the sugars to burn.
After the ribs have reached their final cooking stage, brush a thin layer of your favorite barbecue sauce across both sides of the rack. Return the ribs to the smoker for approximately thirty to forty-five minutes so the sauce can set and develop a glossy finish.
Some pitmasters prefer creating their own glaze by combining barbecue sauce with honey, butter, brown sugar, or a small amount of hot sauce. This produces a balanced combination of sweetness, richness, and mild heat while creating an attractive finish that enhances both flavor and appearance.
If you prefer dry-style ribs, simply skip the sauce altogether and allow the seasoned bark to remain the primary source of flavor.
How to Know When the Ribs Are Done
One of the biggest mistakes beginners make while learning how to smoke ribs in an offset smoker is relying only on cooking time. Every rack cooks differently depending on thickness, fat content, weather conditions, and smoker performance.
Internal temperature provides one useful guideline. Most ribs become fully tender between 190°F and 203°F. However, experienced pitmasters often rely on texture instead of temperature alone.
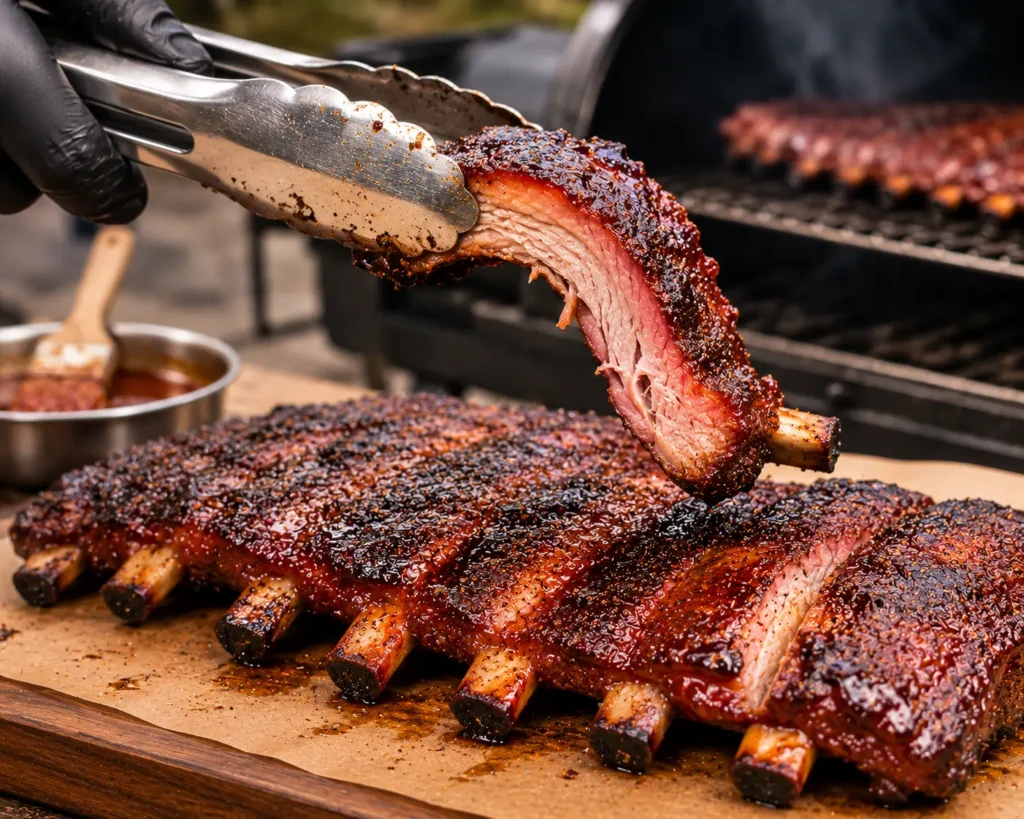
The bend test remains one of the most reliable methods. Lift the rack from one end using barbecue tongs. Properly cooked ribs will bend noticeably while small cracks begin forming across the surface of the bark. The meat should remain attached to the bone rather than falling apart completely.
Another useful indicator is bone pullback. As the meat cooks, it naturally shrinks away from the ends of the bones by approximately one-quarter to one-half inch. This visible pullback is a strong indication that the ribs are nearly ready.
Resting Before Serving
Resting is frequently overlooked, yet it plays an important role in how to smoke ribs in an offset smoker. Once the ribs leave the smoker, the juices inside the meat remain highly active due to the cooking process. Cutting immediately causes much of this moisture to escape.
Allow the ribs to rest for approximately fifteen to twenty minutes before slicing. Loosely covering them with foil helps maintain warmth while allowing juices to redistribute evenly throughout the meat.
After resting, slice carefully between each bone using a sharp knife. Properly smoked ribs should be moist, flavorful, and tender while maintaining enough structure to stay attached to the bone until bitten.
Common Mistakes to Avoid
Many beginners encounter similar problems while learning how to smoke ribs in an offset smoker. Fortunately, most mistakes are easy to avoid with proper preparation and patience.
Cooking at temperatures above 275°F often causes the meat to dry out before connective tissue has fully broken down. Using wet or green wood creates thick white smoke that leaves unpleasant flavors on the meat. Frequently opening the cooking chamber causes unnecessary heat loss and extends cooking time.
Another common mistake is adding too much wood at once. Large wood additions create excessive smoke that can overpower the natural flavor of the pork. Maintaining a small, clean-burning fire with thin blue smoke produces far better results than heavy clouds of white smoke.
Finally, rushing the cooking process usually leads to disappointing barbecue. Great ribs require patience, stable temperatures, and careful fire management from beginning to end.
Expert Tips for Better Smoked Ribs
Choosing quality pork is one of the easiest ways to improve barbecue. Fresh ribs with good marbling remain juicier throughout the smoking process and develop richer flavor than lower-quality cuts.
Using a reliable digital thermometer helps maintain accurate cooking temperatures inside both the smoker and the meat. While built-in lid thermometers provide useful information, grate-level temperatures often differ significantly.
Keeping detailed notes after every cook also accelerates improvement. Record wood type, outside weather conditions, cooking temperature, seasoning, wrapping time, and final results. Over time, these records help create repeatable barbecue success.
Learning fire management is equally important. Small adjustments produce gradual changes, while large damper movements often create unstable temperatures. Patience and consistency remain two of the most valuable skills every pitmaster can develop.
Frequently Asked Questions
Most ribs require between five and six hours when cooked between 225°F and 250°F. Baby back ribs may finish slightly sooner, while larger spare ribs often require additional cooking time.
Oak provides balanced smoke suitable for nearly every cook, while hickory creates stronger traditional barbecue flavor. Apple and cherry offer milder, sweeter smoke that pairs exceptionally well with pork.
Wrapping is optional but recommended for beginners because it helps retain moisture and creates exceptionally tender ribs. Those who prefer firmer bark often cook without wrapping.
Most ribs become tender between 190°F and 203°F. The bend test and bone pullback provide additional confirmation that the ribs are fully cooked.
For the best results, always thaw ribs completely before seasoning and smoking. Frozen meat cooks unevenly and prevents smoke from penetrating properly during the early stages of cooking.
Why Learning to Smoke Ribs in an Offset Smoker Is Worth the Effort
Learning how to smoke ribs in an offset smoker takes practice, patience, and attention to detail, but the rewards are well worth the effort. By selecting quality ribs, preparing them properly, maintaining steady temperatures, using seasoned hardwood, and following proven cooking techniques such as the 3-2-1 method, you can consistently produce barbecue that rivals many professional smokehouses.
An offset smoker provides one of the most authentic ways to cook ribs because it combines indirect heat with natural wood smoke, creating deep flavor, beautiful bark, and tender meat that simply cannot be duplicated by faster cooking methods. As your fire management skills improve, each smoking session becomes more consistent and enjoyable.
Whether you are preparing baby back ribs for a family barbecue or smoking several racks of St. Louis-style ribs for a special gathering, mastering how to smoke ribs in an offset smoker will help you create restaurant-quality barbecue that friends and family will look forward to every time you fire up the smoker.